
ഗ്യാസ് ബർണർ കളർ മങ്ങിയോ; വെട്ടി തിളങ്ങാൻ ഇങ്ങനെ ചെയ്യൂ; ഒരൊറ്റ പ്രയോഗം മതി തീയും നന്നായി കത്തും; വീട്ടമ്മമാർ അറിയാതെ പോവല്ലേ..!! | Gas Burner Cleaning At Home
Gas Burner Cleaning At Home : എല്ലായെപ്പോഴും വളരെയധികം വൃത്തിയായി വെക്കേണ്ട ഭാഗങ്ങളിൽ ഒന്നാണ് അടുക്കള. എന്നാൽ എല്ലാവരും അടുക്കളയിൽ പെട്ടെന്ന് കാണുന്ന ഭാഗങ്ങളെല്ലാം വൃത്തിയാക്കി വയ്ക്കാനാണ് എപ്പോഴും ശ്രദ്ധിക്കുന്നത്. അതേസമയം കുക്കിങ്ങിനായി ഉപയോഗപ്പെടുത്തുന്ന ഗ്യാസ് സ്റ്റൗവിന്റെ ബർണർ പോലെയുള്ള ഭാഗങ്ങൾ വൃത്തിയാക്കാൻ പലരും മെനക്കെടാറില്ല. ഇങ്ങനെ ചെയ്യുന്നത് വഴി ബർണറിന് അകത്ത് ചെറിയ പൊടിയും മറ്റും പറ്റിപ്പിടിച്ച് ആവശ്യത്തിന് ഫ്ളെയിം പുറത്തേക്ക് വരാത്ത അവസ്ഥ ഉണ്ടാകാറുണ്ട്.
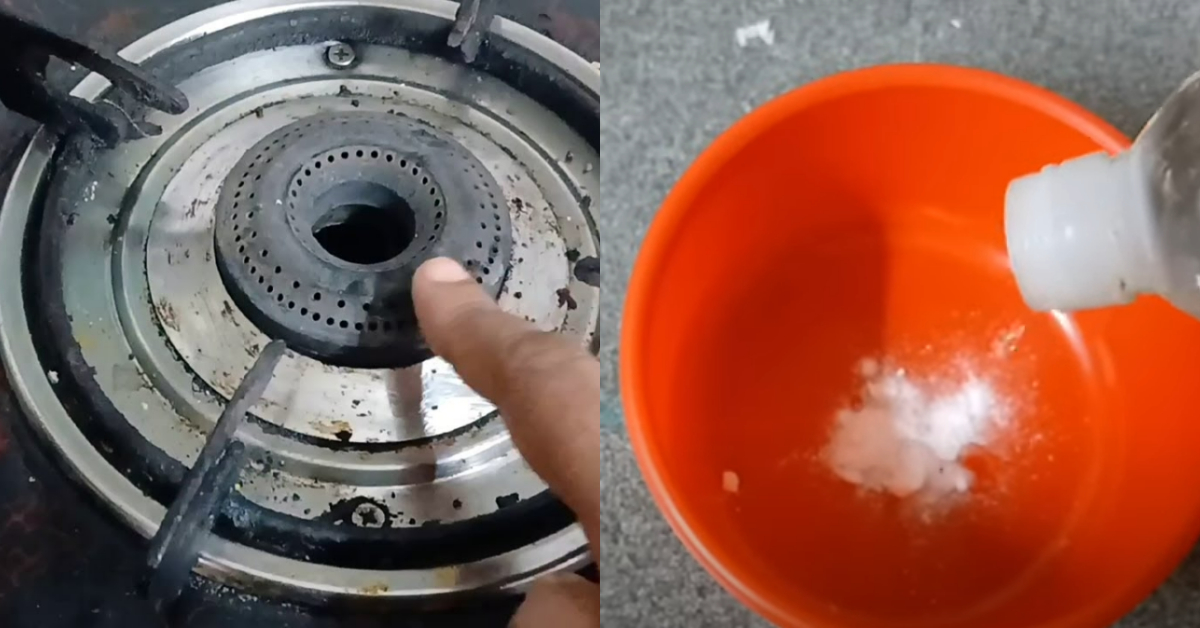
അതുവഴി ഗ്യാസ് കൂടുതൽ അളവിൽ ഉപയോഗപ്പെടുത്തേണ്ട തായും വരാറുണ്ട്. പലപ്പോഴും ബർണറുകൾ എങ്ങനെ വൃത്തിയാക്കണമെന്ന് അറിയാത്തതായിരിക്കും പലരും ഇത്തരം കാര്യങ്ങൾ ചെയ്യാത്തതിന്റെ പുറകിലെ കാരണം. വളരെ കുറച്ചു സാധനങ്ങൾ ഉപയോഗപ്പെടുത്തി എളുപ്പത്തിൽ എങ്ങിനെ ഗ്യാസ് ബർണർ വൃത്തിയാക്കി എടുക്കാൻ സാധിക്കുമെന്ന് വിശദമായി മനസ്സിലാക്കാം. ഈയൊരു രീതിയിൽ ഗ്യാസ് ബർണർ വൃത്തിയാക്കി എടുക്കാനായി ആവശ്യമായിട്ടുള്ള പ്രധാന ചേരുവ ബേക്കിങ് സോഡയാണ്.
ഒരു പാത്രത്തിലേക്ക് ഒരു ടേബിൾ സ്പൂൺ അളവിൽ ബേക്കിംഗ് സോഡ ഒരു സ്പൂൺ അളവിൽ വിനാഗിരി എന്നിവ ചേർത്ത് നല്ലതുപോലെ മിക്സ് ചെയ്ത് എടുക്കുക. ബേക്കിംഗ് സോഡയിലേക്ക് വിനാഗിരി ഒഴിക്കുമ്പോൾ അതിൽനിന്നും ചെറിയ രീതിയിൽ ബബിൾസ് രൂപപ്പെടുന്നതായി കാണാൻ സാധിക്കും. ഈയൊരു കൂട്ടിലേക്ക് അല്പം വെള്ളം കൂടി ചേർത്ത് നല്ലതുപോലെ മിക്സ് ചെയ്ത ശേഷം ഏതെങ്കിലും ഒരു ഡിഷ് വാഷ് ലിക്വിഡ് കൂടി അല്പം ഒഴിച്ചു കൊടുക്കുക. തയ്യാറാക്കിവെച്ച ആ കൂട്ടിലേക്ക് ക്ലീൻ ചെയ്യാനുള്ള ബർണർ ഇട്ട് കുറച്ചുനേരം റസ്റ്റ് ചെയ്യാനായി വയ്ക്കുക.
ഇങ്ങനെ ചെയ്യുമ്പോൾ തന്നെ ബർണറിലെ അഴുക്കെല്ലാം ഒരു പരിധി വരെ പോകുന്നതാണ്. ബാക്കിയുള്ള ചെറിയ പൊടിപോലുള്ള സാധനങ്ങൾ കൂടി പോയി കിട്ടാനായി ഉപയോഗിക്കാത്ത ഒരു ടൂത്ത് ബ്രഷ് ഉപയോഗിച്ച് ബർണറിന്റെ മുകൾഭാഗവും ഉൾഭാഗവുമെല്ലാം ഉരച്ച് ക്ലീൻ ചെയ്ത് എടുക്കാവുന്നതാണ്. വളരെ എളുപ്പത്തിൽ പണിപ്പെടാതെ തന്നെ ഈ ഒരു രീതിയിൽ ഗ്യാസ് സ്റ്റൗവിന്റെ ബർണറുകൾ ഈസിയായി ക്ലീൻ ചെയ്തെടുക്കാം. വിശദമായി മനസ്സിലാക്കാൻ വീഡിയോ കാണാവുന്നതാണ്.Gas Burner Cleaning At Home Credit : Malayali Corner
Gas Burner Cleaning At Home
- Turn Off and Cool Down
Make sure the gas is turned off and the burners are completely cool before starting. - Remove Burner Parts
Carefully lift off the grates, burner caps, and burner heads (if removable).
If they’re stuck, gently wiggle them free.
- Soak the Parts
Fill your sink or a basin with hot water and dish soap.
Soak the grates, caps, and heads for 20–30 minutes to loosen grime.
- Scrub Off Grease and Gunk
Use a brush or sponge to scrub off the loosened dirt.
For stubborn stains, make a paste with baking soda and water, apply it to the area, and scrub.
- Clean Burner Holes
Use a pin, toothpick, or safety needle to clear any clogged burner holes (especially on the burner head).
Be gentle to avoid damaging them.
- Wipe Down the Stove Surface
While the parts are soaking, clean the stove surface with warm soapy water.
For stuck-on stains, use a vinegar spray or baking soda paste.
- Rinse and Dry
Rinse all burner parts thoroughly with clean water.
Dry them completely with a cloth — moisture can prevent proper ignition.
- Reassemble the Burner
Once everything is dry, reassemble the burner parts in the correct order.
Make sure they sit properly.
- Test the Burner
Turn on the burner to ensure it ignites and the flame is steady.
Clean your burners once a month or more often if you cook frequently.
Avoid using harsh metal brushes on stainless steel to prevent scratching.
For extreme buildup, use a degreaser or let parts soak overnight.
Comments are closed.