
നിറയെ കായ്ക്കുന്ന പാവയ്ക്കാ കൃഷി ചെയ്യാം; ഇനി പെയിന്റ് ബക്കറ്റിൽ 100 മേനി പാവൽ; ഇനി അടുക്കള വേസ്റ്റ് മിനിറ്റുകൾക്കുള്ളിൽ കമ്പോസ്റ്റ് ആക്കി മാറ്റാം; പരീക്ഷിക്കൂ..!! | Bittermelon Krishi Tips Using Bucket
Bittermelon Krishi Tips Using Bucket : വീട്ടിൽ പഴയ പെയിന്റ് ബക്കറ്റ് ഉണ്ടോ? അടുക്കളയിലെ പച്ചക്കറി വേസ്റ്റ് മിനിറ്റുകൾ കൊണ്ട് ഈസിയായി കമ്പോസ്റ്റ് ആക്കി മാറ്റാം; പെയിന്റ് ബക്കറ്റിലെ കൃഷിയും കിടിലൻ കമ്പോസ്റ്റും! വീട്ടിൽ കൃഷി ചെയ്യുമ്പോൾ ചെടി നടുന്നതും അതിന് വളം തയ്യാറാക്കുന്നതും ഒരേസമയം ചെയ്യാൻ പലർക്കും ബുദ്ധിമുട്ടുള്ള കാര്യമാണ്. എന്നാൽ സമയം ലാഭിക്കുന്നതിനായി ഇതു രണ്ടും ഒരേ സമയം തന്നെ ചെയ്യാൻ സാധിക്കുമോ എന്നാണ് അധികവും കർഷകർ നോക്കുന്നത്.
ഇന്ന് അങ്ങനെയുള്ളവർക്ക് ആയുള്ള ഏറ്റവും എളുപ്പ മാർഗത്തിൽ കൃഷിയും വളം നിർമ്മാണവും എങ്ങനെ ഒരേസമയം ചെയ്യാമെന്നാണ് ഇന്ന് നോക്കുന്നത്. അതിനായി ആദ്യം തന്നെ വേണ്ടത് വലിയ ഒരു പെയിൻറ് ബക്കറ്റ് ആണ്. വീട്ടിൽ പെയിൻറ് ബക്കറ്റ് ഇല്ലാത്ത വർക്ക് ആക്രി കടയിൽ നിന്നും മറ്റും ഇത് വാങ്ങാവുന്നതാണ്. പെയിൻറ് ബക്കറ്റിന്റെ അകവും പുറവും നന്നായി വൃത്തിയാക്കിയ ശേഷം അതിന് ചുവട്ടിൽ ദ്വാരം ഇട്ടുകൊടുക്കുകയാണ് ആദ്യം വേണ്ടത്.
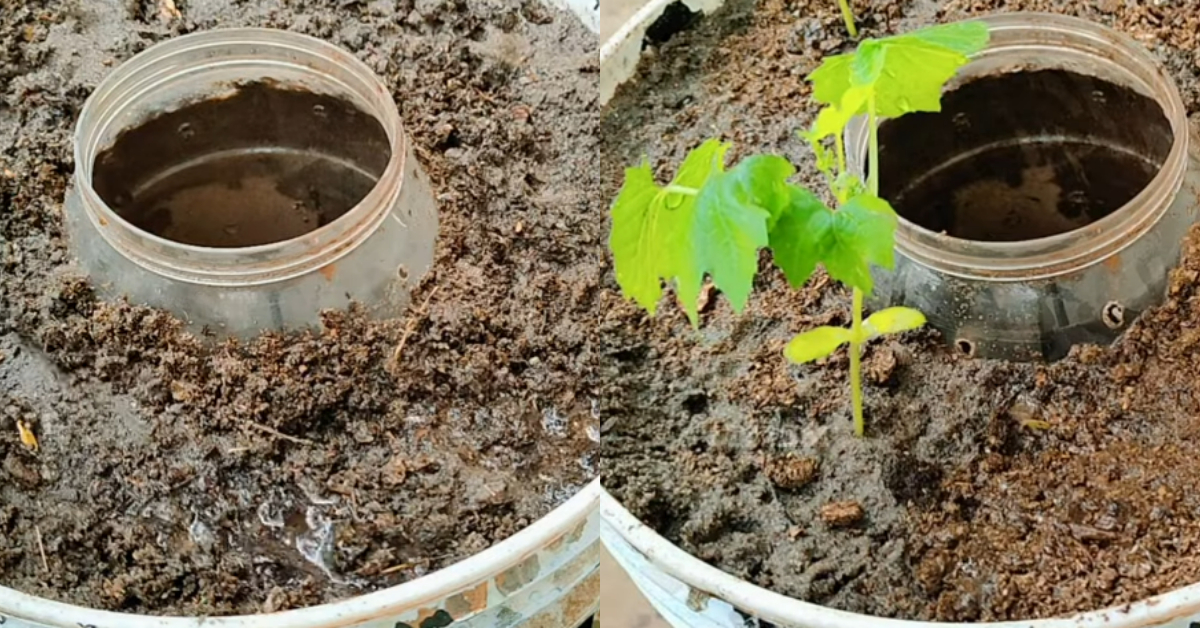
ചെടിക്ക് ഒഴിച്ചു കൊടുക്കുന്ന വെള്ളം അമിതമായി കഴിഞ്ഞാൽ അത് പുറം തള്ളുന്നതിനാണ് ബക്കറ്റിന്റെ അടിയിൽ ഇത്തരത്തിൽ ദ്വാരം ഇട്ടുകൊടുക്കുന്നത്. അതിനുശേഷം ബക്കറ്റ് നിറക്കുകയാണ് അടുത്തതായി ചെയ്യുന്നത്. അതിനായി ഏറ്റവും താഴെ തട്ടിൽ കരിയില ഇട്ട് കൊടുക്കാം. അതിനു മുകളിലേക്ക് മണ്ണ് പിന്നീട് എല്ലുപൊടി, വേപ്പിൻ പിണ്ണാക്ക്, ചാണക പൊടി ഏതെങ്കിലും ഒന്ന് ഇട്ടു കൊടുക്കാവുന്നതാണ്. ഇതിനു മുകളിലായി ഒരു പാത്രത്തിൽ നിറയെ ഹോളുകൾ ഇട്ടശേഷം
ഒരു ബോട്ടിൽ ഇതിലേക്ക് ഇറക്കി വയ്ക്കാവുന്നതാണ്. ശേഷം ഇതിനു ചുറ്റും മുൻപ് ചെയ്തത് പോലെ തന്നെ കരിയില, ചാണകപ്പൊടി, മണ്ണ് എന്നിവ ചേർത്ത് നിറച്ച് എടുക്കാവുന്ന താണ്. അതിനുശേഷം നടാൻ ഉദ്ദേശിക്കുന്ന വിത്ത് ഇതിൽ നട്ടു കൊടുക്കാവുന്നതാണ്. ഇനി നമ്മൾ എടുത്തു വച്ചിരിക്കുന്ന ബക്കറ്റിലേക്ക് എങ്ങനെ അടുക്കള വേസ്റ്റ് നിറയ്ക്കാം. ഇതിനെ കുറിച്ചുള്ള കൂടുതൽ വിവരങ്ങൾ വിശദമായി അറിയുവാൻ വീഡിയോ മുഴവനായും കാണൂ. Bittermelon Krishi Tips Using Bucket Credits : MY AIM
Bittermelon (Karela) Farming in a Bucket – Step-by-Step
📦 1. Choose the Right Bucket
- Use a 20-liter (minimum) plastic bucket or grow bag.
- Ensure drainage holes at the bottom to prevent waterlogging.
🌱 2. Prepare the Soil Mix
Use a light, fertile, and well-draining mix:
- 40% garden soil
- 30% compost/vermicompost
- 20% cocopeat or dried leaf mulch
- 10% sand (for drainage)
Optional: Add a handful of neem cake or crushed eggshells to prevent pests.
🌾 3. Sow the Seeds
- Soak bitter gourd seeds overnight in water (or in buttermilk for better germination).
- Sow 2–3 seeds directly in the bucket, about 1 inch deep.
- After germination (5–7 days), thin to the healthiest one or two plants.
☀️ 4. Sunlight Needs
- Place the bucket where it gets at least 6–8 hours of direct sunlight daily.
💧 5. Watering
- Keep the soil moist but not soggy.
- Water once daily in summer, less in rainy/cool weather.
- Ensure water drains out from the bottom holes.
🪜 6. Support with Trellis or Sticks
- Bitter melon is a climber.
- Add bamboo sticks or tie strings to a balcony grill, wall, or vertical trellis.
- Train the vines as they grow.
🌼 7. Fertilizing
- Add organic compost or liquid fertilizer (like jeevamrut or compost tea) every 10–15 days.
- When flowers appear, a handful of wood ash or banana peel powder helps with fruiting.
🐛 8. Pest Control (Natural)
- Use neem oil spray (once a week) to prevent:
- Aphids
- Mealybugs
- Powdery mildew
- Avoid chemical pesticides in containers.
🍈 9. Harvesting
- Fruits are ready 12–15 days after flowering.
- Harvest when they’re green and tender, before they start turning yellow.
Regular harvesting encourages more fruiting.
✅ Quick Tips
- One plant per 20-liter bucket is ideal.
- Don’t let fruits over-ripen – it reduces yield.
- Keep the vine trimmed and remove dried leaves to maintain airflow.
Comments are closed.