
കോവക്ക മുന്തിരി കുല പോലെ കായ്ക്കാൻ ഇത് ചെയ്തു നോക്കൂ; വീട്ടിൽ പഴയ ചാക്ക് ഉണ്ടോ; കിലോ കണക്കിന് കായ്ക്കാൻ ഇങനെ പരീക്ഷിക്കൂ..!! | Kovakka Krishi Using Cement Bag
Kovakka Krishi Using Cement Bag : നമ്മുടെയെല്ലാം വീടുകളിൽ സ്ഥിരമായി ഉണ്ടാക്കുന്ന വിഭവങ്ങളായിരിക്കും കോവയ്ക്ക ഉപയോഗിച്ചുള്ള തോരനും മറ്റും. വളരെ എളുപ്പത്തിൽ പടർത്തിയെടുക്കാവുന്ന കോവൽ വള്ളി എങ്ങനെ കൃഷി ചെയ്ത് എടുക്കണം എന്നത് പലർക്കും അറിയുന്നുണ്ടാകില്ല. വളരെ എളുപ്പത്തിൽ കോവൽ വള്ളി പടർത്തി നിറച്ച് കായകൾ ഉണ്ടാക്കിയെടുക്കാനായി സാധിക്കും. അതേപ്പറ്റി വിശദമായി മനസ്സിലാക്കാം.
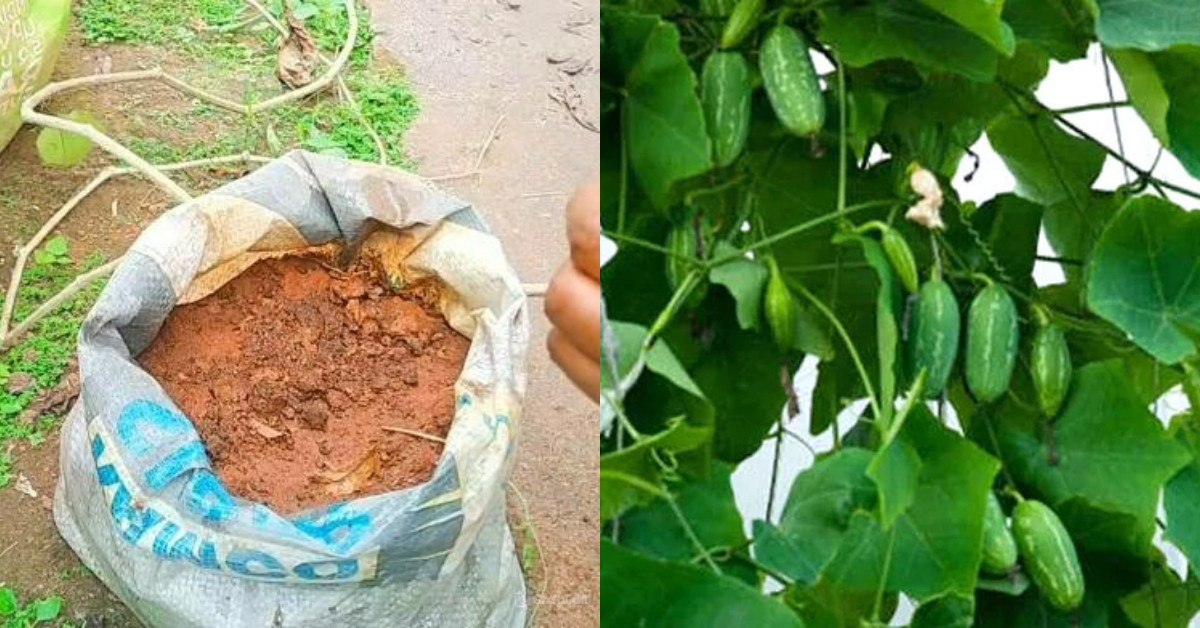
കോവൽ വള്ളി എളുപ്പത്തിൽ പടർത്തി ഇടാനായി ഒരു ചാക്ക് ഉപയോഗിച്ച് കൃഷി ചെയ്യാവുന്നതാണ്. ഉപയോഗിച്ച് തീർന്ന സിമെന്റിന്റെ പ്ലാസ്റ്റിക് ചാക്ക് വീട്ടിലുണ്ടെങ്കിൽ അത് ഉപയോഗപ്പെടുത്താം. അതിനകത്തെ പൊടിയെല്ലാം പൂർണ്ണമായും കളഞ്ഞശേഷം ഒരു ലയർ കരിയില ഇട്ടുകൊടുക്കുക. ഇങ്ങനെ ചെയ്യുന്നത് വഴി ചാക്കിന്റെ കനം കുറയ്ക്കാനായി സാധിക്കും. അതിന് മുകളിലായി ജൈവ കമ്പോസ്റ്റ് മിക്സ്
ചെയ്ത് ഉണ്ടാക്കി എടുത്ത് മണ്ണ് ഇട്ടുകൊടുക്കണം. ജൈവ കമ്പോസ്റ്റ് തയ്യാറാക്കാനായി അടുക്കള വേസ്റ്റ് ഉപയോഗിച്ചാൽ മതി. ശേഷം മണ്ണിന് മുകളിലായി കുറച്ച് ചാണകപ്പൊടി കൂടി വിതറി കൊടുക്കാം. ഇങ്ങനെ ചെയ്യുമ്പോൾ പെട്ടെന്ന് തന്നെ കോവലിന്റെ വള്ളി പിടിച്ച് കിട്ടുന്നതാണ്. പിന്നീട് വീണ്ടും മണ്ണിട്ട് ചാക്ക് ഫിൽ ചെയ്ത് കൊടുക്കണം. അതിന് മുകളിലായി മണ്ണിലേക്ക് ഇറങ്ങി നിൽക്കുന്ന വിധത്തിൽ വെള്ളം ഒഴിച്ചു
കൊടുക്കുക. നന്നായി മൂത്ത കോവലിന്റെ തണ്ട് എടുത്ത് അത് ചാക്കിന്റെ നടുക്കായി നട്ടു കൊടുക്കുക. അതോടൊപ്പം കുറച്ച് കരിയില ഉപയോഗിച്ച് ചെടിക്ക് പുതയിട്ട് കൊടുക്കാവുന്നതാണ്. ഈയൊരു രീതിയിൽ കോവൽ വള്ളി പടർത്തി വിടുകയാണെങ്കിൽ വളരെ എളുപ്പത്തിൽ തന്നെ കായ്കൾ ലഭിച്ചു തുടങ്ങുന്നതാണ്. സ്ഥല പരിമിതി പ്രശ്നമായിട്ടുള്ളവർക്ക് തീർച്ചയായും ഈ ഒരു രീതിയിൽ കോവയ്ക്ക കൃഷി ചെയ്ത് നോക്കാവുന്നതാണ്. വിശദമായി മനസ്സിലാക്കാൻ വീഡിയോ കാണാവുന്നതാണ്. Kovakka Krishi Using Cement Bag credit: POPPY HAPPY VLOGS
🧺 Materials Required:
- Used Cement Bags (HDPE woven type – not paper ones)
- Good-quality Kovakka cuttings (preferably stem cuttings with at least 3–4 nodes)
- Potting mix:
- Red soil or garden soil – 1 part
- Cow dung or compost – 1 part
- Sand or cocopeat – 1 part
- Support system:
- Poles or sticks
- Strings or wires for creeper support
- Watering can or hose
- Mulch (optional, like dry leaves)
🪴 Step-by-Step Instructions:
1. Preparing the Cement Bag:
- Shake off any cement dust and rinse if needed.
- Make drainage holes at the bottom and sides using a hot nail or knife.
- Fold the top of the bag outward to make it sturdier and create a wider opening.
2. Filling the Bag with Potting Mix:
- Fill the bag ¾ full with the potting mix.
- The mix should be loose and well-drained.
3. Planting Kovakka Cuttings:
- Take healthy 6–8 inch long stem cuttings.
- Each cutting should have at least 2–3 nodes.
- Insert 1 or 2 cuttings in the center of the bag, burying the lower nodes in the soil.
- Water thoroughly.
4. Providing Support:
- Kovakka is a climbing vine, so it needs support.
- Place a stick or bamboo in the bag or near it.
- Use strings or wires to guide the vine upward or sideways (can be trained along walls, fences, or a trellis).
5. Watering and Care:
- Water daily in summer, every 2–3 days in cooler months.
- Avoid water stagnation.
- Add compost or liquid fertilizer (jeevamruth, diluted cow urine, fish amino acid) every 15–20 days.
- Keep checking for pests like aphids or mealybugs.
6. Pruning and Training:
- Pinch the tips of the vine to encourage side shoots.
- Train the vines on the support to avoid crowding.
🍃 Harvesting:
- Kovakka starts yielding in 2–3 months after planting.
- Harvest the fruits when they are green and tender.
- Continuous harvesting promotes more fruiting.
Comments are closed.